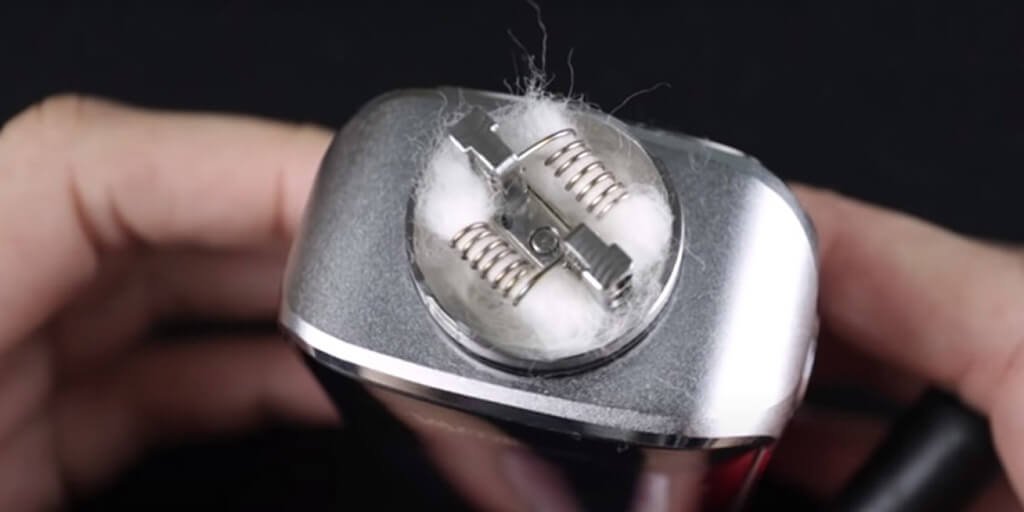
Cleaning coils is a common concern among vape users. Although the process is no rocket science, it's no cakewalk either.
To begin with, replaceable coils are available in two forms
Coils for tanks – they come in a little metal chamber that features an absorbent wick
Coils for rebuildable – these coils require installation and wick
Each class requires a unique cleaning approach, which is discussed extensively in this article:
Before we discuss the types of coils and their unique maintenance approaches, here are general ways to degunk your coil:
Efficient Tips To Keep Your Coils Clean
Quick Swabbing
Many experienced smokers prefer to do a quick swabbing after every day's vaping. This process takes only a couple minutes and helps flush off build-ups accumulated during the day's sessions – before it hardens. When residue stays too long on your coil, it results in those unsightly colors and burns out.
You can avoid this with a q-tip and little alcohol or water and rub your coils, gently. If you wish to change the flavor, you can do this quick clean before you rewick and switch.
Soak Coils
For more thorough cleaning, you may opt for coil soaking. Soaking your coils in alcohol or warm water through the night weakens residue hiding in hard to reach corners. This option may be more effective if you do not clean it daily.
Soaking, however, comes with its downsides.
For pre-designed atomizer that comes with cotton, soaking makes the cotton more challenging to absorb e-juice even if the cotton dries. This means after the soak, expect less vapor and flavor.
Hence, soaking is better used if the coils can be soaked without the wick.
Now, let's discuss the different coils and their unique cleaning techniques.
Vape Coil Types and Their Cleaning Approches
Replaceable Coils
While you can clean replaceable coil heads with clearomizers and sub-ohm tanks, you may not get an all-new look. In the best case, you may get afew days of the active coil head. This is because the wicks may get somewhat better after soaking dirty coils and allowing water go through to flush off some residue.
Besides, after cleaning, it usually takes a lot of time for water to evaporate before usage. Well, you'd have to wait.
To clean, the soak-and-rinse method is considered the most effective. Here are the easy steps:
- Soak your coil in an ethanol solution for at least two hours. Where ethanol is unavailable, any cheap vodka or vinegar should do.
- Run under the faucet to rinse
- Rinse againwith distilled water
- From the open side of the coil, blow in air to force out water through the wicking holes
Allow water to evaporate. You may leave under the sun to dry faster. But still don't expect it to dry up any time too soon. When dried, you'd notice better-looking wicks.
Don't expect too much, though. Regardless of its seeming 'revival,' you'd still need a coil head replacement pretty soon.
Rebuildable Coils
Rebuildable atomizers require that you clean your coils often enough. When the coils get gunked up,the vapor reduces, and so does the flavor. Thankfully, here are some easy tips to help get your coils good and 'seemingly' new.
First, take off the wicks. If the coils are not badly used, a quick-dry burn should do. Here's a quick guide to help you achieve that:
- Take off the wicks
- Lightly, dry burn the coils
- Take off atomizer
- Leave under a faucet
- Use a toothbrush to brush off lightly. If you have a coil cleaning tool, better.
- Run under the faucet again
- Dry burn lightly again to dry out the water
When brushing your coil, it'sOK to add some dishwashing liquid. But do well to rinse thoroughly in hot water when done.
If no improvement in flavor or vapor production, you may need to rebuild your atomizer.
Indeed, a good clean will help extend your coil's lifespan. However, over time, there'd eventually be a need to replace.
How Do I Know My Coil Needs Replacement?
When your device actually needs a change, there's nothing you can do to make them perform as new. Fact is, the more you use, the sooner the need for replacement. If you're not sure when is right to get a new coil, here are typical tell-tales:
- If your atomizer has a leakage
- If the coil looks visibly crusted, dark, or damaged
- Reduced vapor production
- The vaporflavor comeswith hints of burnt evenaftera goodclean.
Good enough, changing your vape coils can be a breeze. Here's the simple guide to replacing your coil
- Detach the tanks
- Empty any liquid left
- Unscrew the coil from the tank
- Twist in your new coil
- Attach the tank back to the vaporizer.
Wrap up
Experienced vapers know there's a clear link between a great vaping experience and replacement coils. E-cig users have found that regular cleaning is the secret to a long-lasting vaping device and top-notch performance. Cleaning as well helps you save on coil replacement costsin the long run.
That said, no matter how well you treat your coils, with frequent usage, expect to see the need for a replacement soon.


